 One of our nephews has a vast collection of found gems: dried and completely intact dragonflies, a rock he found in an area devoid of other rocks, 12-inch long pine needles, snail shells, bullet-shaped acorns, you get my drift. He's curious and can't help but find/dig/spot things. So for his birthday, I thought I'd make him a treasure.


 The gift started as a hieroglyphic puzzle. I wanted it to spell out happy birthday and his name. As my idea snowballed, it needed the phrase "we love you" so he wouldn't mistake it for something I picked up in an Egyptian bazaar, souk or greeting card shop. I'm kidding; he's wiser than that. It added additional design/puzzle complexity.
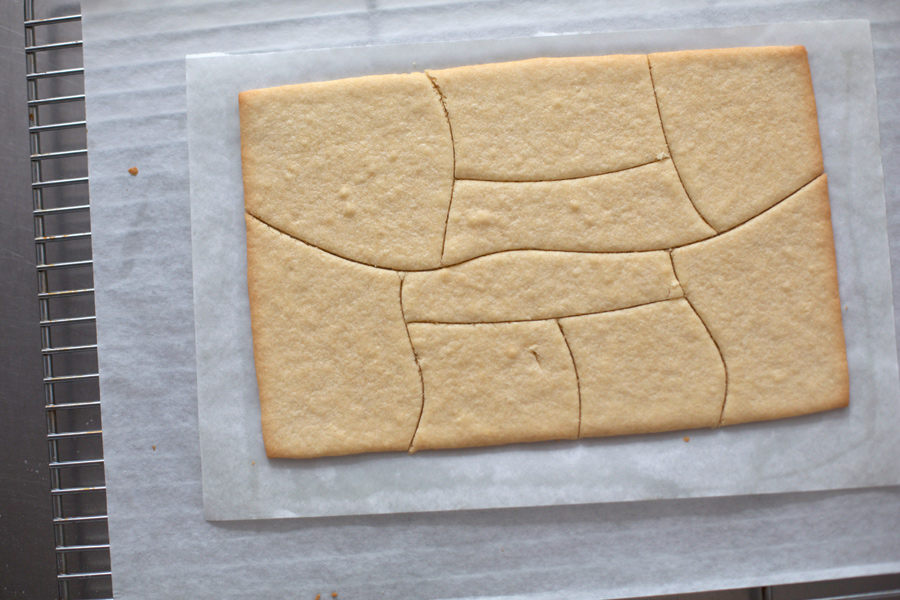
I found this Rosetta Stone and used it as the character set for constructing the words. I imported the image into Photoshop then cut and pasted the characters, moving them around to spell out my words. Then in Illustrator, I drew a box for the full cookie and the lines I'd use to make the puzzle pieces.
The puzzle pieces were cut and ready (sugar cookie recipe used was from Cook's Illustrated). I laid the puzzle pieces on the rolled and chilled dough as if the puzzle was assembled and cut the pieces out. Rechill. These lines will act as a guide later. Initially I tested a theory of baking two pieces cut out and baked separately - to see how well the pieces would fit back together. No go. The pieces expanded on all four sides precluding any fitting together. It had to be baked assembled and then cut out.
The initial puzzle pieces I had were too complicated. Since all the lines needed to be cut after the cookie was baked, the lines needed to be simplified or else there wouldn't be enough time to cut all the pieces before the cookie cooled and hardened. And, since I had a specific design I needed to follow, I needed specific pattern pieces. If it were some free form design, I could have cut whatever squiggly lines I wanted but in this case, I needed to cut with purpose.
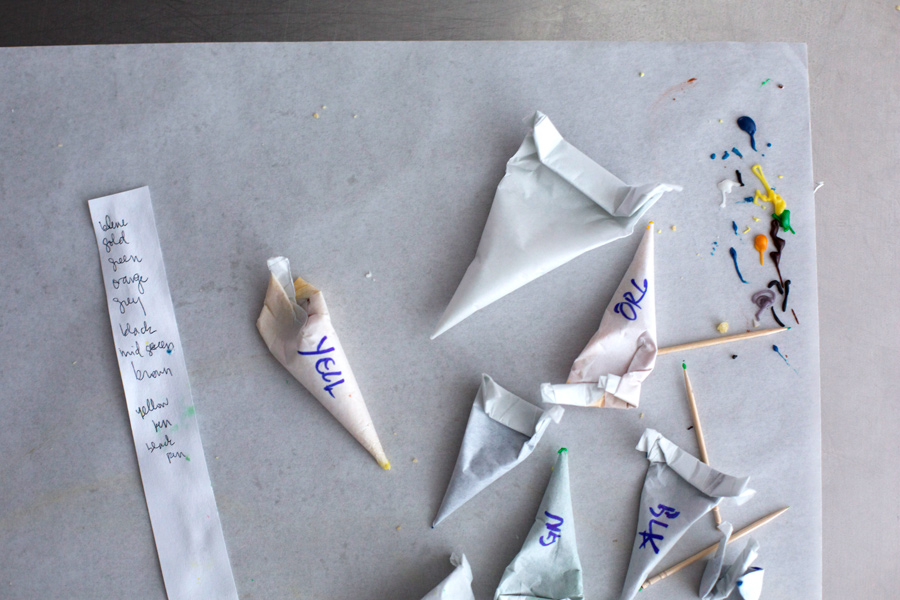
Once the cookies cooled, the glazing began! I piped an edge on each piece, let it dry before flooding each cookie with icing, then (im)patiently waited for the icing to dry. I made a list of different colors I'd need and mixed them up. Since all the tubes looked the same, I sharpied each one. With a steady hand, steel gaze and some toothpicks, I decorated each piece, carefully reviewing each character before drawing. Some of the icings were a little looser (damn you, Mr. Blue and Ms. Orange!) so I needed to go over those areas with some white icing, kind of like icing White-Out.
Phase One: Complete. Onto: The Gingerbread Box.
Decorative Icing
1 box (1 pound) confectioners sugar
2 egg white or 4 tablespoons meringue powder
8 drops flavor extracts - almond, vanilla, orange, etc. (I used orange for these cookies)
food coloring
Whisk confectioners sugar and egg white together until smooth. Add extracts. When whisk is raised, there should be a raised trail of icing on the surface that lasts for 3-4 seconds. If too thin, add more confectioners sugar. This consistency is good for outlining. For a thinner consistency for flooding, drop by drop add water until the trail disappears in 2 seconds.
If using meringue powder, whisk the confectioners sugar and meringue powder together. Add about 1/3 cup water and whisk until smooth. Refer to the above for viscosity.
Keep bowl covered with a damp cloth. If storing for later use, wrap bowl in plastic film over the damp cloth. Store in refrigerator for up to 3 days. Re-whisk if stored since the confectioners sugar may have settled.