 Like most couples that are first dating, Mr. Mari and I asked each other a bajillion questions: What’s your favorite movie? Where did you grow up? What’s your favorite dessert? Well, when Mr. Mari responded to the last question with ‘Princess Cake’, I just stared at him. What? What the hell’s a Princess Cake? I knew he was a Disney fan but really? A Princess Cake? He obviously had to explain.
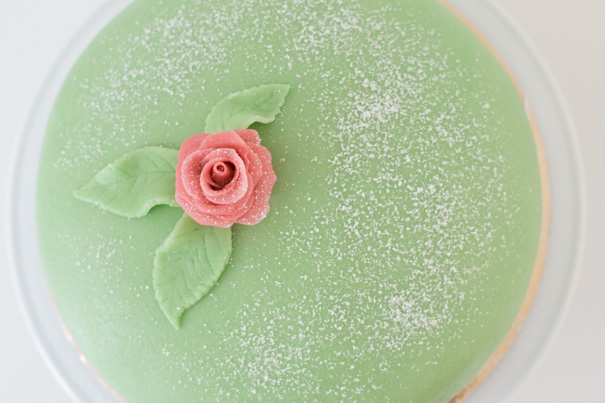
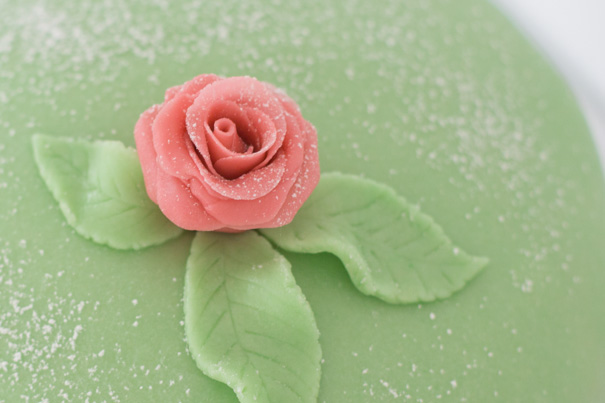 Growing up in Ross, a town outside of San Francisco, there were three Swedish bakeries in the area. Everyone he knew would get their birthday cakes from one of these Swedish bakeries. Prinsesstårta, Princess Tart or Cake was THE cake of childhood birthday parties. It’s comprised of three layers of sponge cake, a thin schmear of raspberry jam, some vanilla pastry cream, a dome of whipped cream and cloaked in a layer of green marzipan. Oh, and don’t forget the marzipan rose on top. Supposedly some Swedish princesses in the early-1900s really liked the cake. All I knew was Mr. Mari LOVED this cake. I finally had some on our honeymoon. On our way to Napa, we stopped off at the bakery his family purchased their cakes. Fantastic. It’s super light and not very sweet; a fluffy and friendly cake. I understood what (some of) the fuss was about.
 Fast forward to this year. While on one of our many trips to IKEA to furnish our new home, I stumbled across the IKEA Fika "Homemade is Best" cookbook. Low and behold, there was a recipe for Princess Cake. Determined to make Mr. Mari’s dream dessert for his birthday, I bought the book. Now, we all know IKEA for its low-cost, do-it-yourself furniture. However, I don’t know how many of these recipes were actually tested. Making a three-layer 10-inch cake with ½-cup flour, ½-cup potato flour (turns out it should be potato starch), some superfine sugar, a teaspoon of baking powder and three eggs didn’t seem like it would work. And it didn’t. It was as flat as one layer needed to be. I ended up referring to a couple recipes online to round out the IKEA recipe.
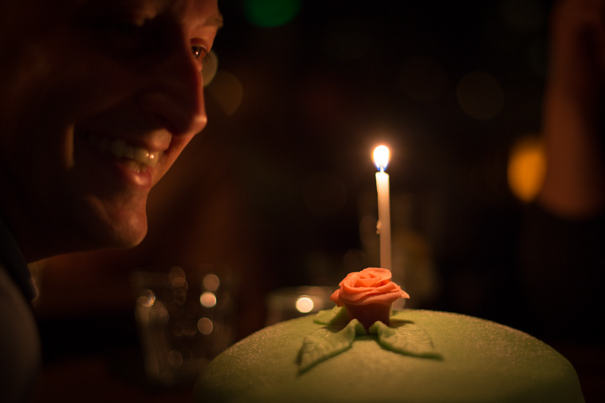 Was it easy to make? No, it’s definitely labor and time intensive. Would I make it again? Yes, absolutely. How can I not when I know I’m guaranteed a smiling, giddy with childlike-glee guy?
I made this cake over the course of three days so I wouldn’t stress out. Day one: make and color the marzipan; Day two: bake the cake base and make the pastry cream; Day three: make the whipped cream and assemble the cake.
PRINSESSTÅRTA (PRINCESS CAKE) - serves 12 or one Mr. Mari
Recipe adapted from semiswede, Lovescool, and IKEA’s Fika Cookbook
MARZIPAN (there will be extra)
14-ounces (two tubes) almond paste
3-cups confectioners’ sugar
7-tablespoons corn syrup
1/2-teaspoon almond extract
Green and red/pink food coloring
SPONGE CAKE
4 large eggs
1-cup granular sugar
1/2-cup all-purpose flour
1/2-cup potato starch (not potato flour)
1-teaspoon baking powder
Pinch salt
PASTRY CREAM
2 egg yolks
2-tablespoons sugar
1-tablespoon cornstarch
2/3-cup whole milk
2/3-cup whipping cream
1/2-teaspoon vanilla extract
WHIPPED CREAM
1-tablespoon raspberry liqueur
1-tablespoon water
1-teaspoon gelatin
2-cups heavy whipping cream
3-tablespoons confectioners’ sugar
Plus 1/4-cup raspberry jam
INSTRUCTIONS:
MARZIPAN:
Put the almond paste in the bowl of a stand mixer with paddle attachment. Turn to the lowest setting and break up the almond paste. Slowly add the confectioners’ sugar to blend. It will look crumbly. Add in the corn syrup and almond extract to blend. Once loosely combined, turn off the machine and dump out the almond mixture onto a confectioners’ sugared surface. Knead the mixture until smooth. Add a little confectioners’ sugar if it’s too sticky. Break off about 1/4-cup’s worth and set aside. Add 1 to 2 drops of green food coloring to the remaining almond dough. Knead until fully blended. If it’s too light (you want this a little minty looking), add more drop by drop - remember you can add more but you can’t add less. Wrap tightly in plastic wrap and put in fridge. Repeat with the 1/4-cup almond dough using red food coloring - be very careful here since you have much less to color. Keep in fridge.
SPONGE CAKE:
Heat oven to 325 degrees. Place an oven rack on lowest rack position. Spray a 9-inch cake pan with cooking spray, line the bottom with parchment paper and spray again. Dust with flour and tamp out the extra.
Put the egg yolks and sugar in the bowl of a stand mixer with whip attachment. Beat on high until light in color, about 5 minutes. Meanwhile, sift the all-purpose flour, potato starch, baking powder and salt together. Remove egg mixture bowl from stand mixer and sprinkle about two tablespoons of the flour mixture on top. Very gently fold the egg mixture to incorporate. Add about three tablespoons of the flour mixture and fold. Repeat by adding additional flour each time. Gently pour into your cake pan and smooth out the top. Bake for about 30 minutes or until toothpick comes out clean. Let the cake cool slightly before turning it out onto a wire cooling rack (I made sure the top faced up on the rack).
PASTRY CREAM:
Put egg yolks in a medium-sized bowl. Sift the sugar and cornstarch together in a separate bowl. Set aside. In a small-medium sized pot, heat the milk and heavy cream to almost a boil. Whisk the sugar mixture into the eggs until blended. Ladle a 1/2-cup of the hot milk into the egg mixture, whisking constantly. Add another 1/2-cup, whisking constantly. Add the hot egg mixture into the hot milk. Over medium heat, cook the cream until almost a boil, constantly scraping the bottom with a silicone spatula. Immediately remove from heat and place in an ice water bath. Add the vanilla extract and stir to incorporate. Place a layer of plastic film on directly on the surface of the pastry cream so it doesn’t form a skin. Chill in fridge.
WHIPPED CREAM:
Place a large mixing bowl and hand mixer beaters in fridge to chill for at least 15 minutes.
In a small bowl add the raspberry liqueur and water. Sprinkle the gelatin on top and let the gelatin bloom, about four minutes. Melt the gelatin in the microwave in 15-second increments until gelatin is melted. Set aside.
Remove bowl and beaters from fridge and beat the heavy cream until frothy. Add confectioners’ sugar and beat until soft peaks form. Slowly add gelatin and continue to beat until stiff peaks form. Place back in fridge until ready to use.
TO ASSEMBLE:
Remove marzipan from fridge at least 30 minutes prior to rolling it out.
Whip the pastry cream until smooth. Add a little less than half of the whipped cream to the pastry cream.
Cut the cake into three layers. Trim the top edge off of the top layer. Place the bottom layer of cake down on a cake board. Schmear the raspberry jam on the layer. Spread half the pastry cream mixture on top. Add a cake layer. Spread the remaining half of the pastry cream to the second layer. Add the final cake layer. Put all but 3/4-cup of the whipped cream on top, mounding the cream in the center. Use the remaining 3/4-cup of whipped cream to coat the sides. Place in the fridge for about half an hour to chill.
Cut off about 1/3 of the marzipan and set aside for another use. Roll out the remaining marzipan on a confectioners’ sugar board until about 15-inches in diameter, about 3/16-inch thick. Place cake on a plate that’s smaller than the cake so you have at least a 1/2-inch of space between the cake and the counter.
Fold the marzipan over your rolling pin so the center of the marzipan in on the rolling pin. Hold the rolling pin in between you and the cake. Slowly move the rolling pin backwards so the bottom edge of the marzipan meets the bottom edge of the cake. Keep moving the rolling pin backwards so the entire cake is now covered with marzipan. Gently make additional folds to the marzipan “skirt”, pressing the marzipan to the cake. Press the marzipan to the bottom edge of the cake board. Using the bottom edge of the cake board, trim off the excess marzipan with a paring knife. Gently press the marzipan to the cake and smooth out the surface with your hand. Put the cake in the fridge to chill.
Make your rose and leaf garnish, see tutorial here. Sift a light coating of confectioners’ sugar on top of your cake. VERY lightly wet your garnish so it sticks to the cake’s surface. Keep chilled until serving. Phew and enjoy!