hi there!

I’m Mari.
On Marivelous Me! you’ll find recipes, food gifts, food I’ve traveled for and food solutions. Poke around, maybe you’ll find inspiration for something you’re working on. Enjoy! 

recipes
Wednesday
May082013

Scrambled Scallion Eggs

For the longest time, I was really terrible at making scrambled eggs. I’d watch my mom and sister in law make eggs and theirs would come out perfectly fluffy and plump; mine would look scratchy and dry. They'd always use a large skillet so when I returned home, whenever I tried making eggs, I too would use a large skillet - but I was only cooking for Mr. Mari and me. Turns out, the pan was the key flaw in my process. 

What the hot pan does is trap steam in the eggs - soufflé-ing them. If you use too large a pan, there’s too much surface area for the eggs to cover thus not enough steam/heat gets trapped. Once I switched to a smaller pan, there was enough egg volume that they'd soufflé (My mom and SIL were always making eggs for more than two persons - thus the larger pan). Adding cheese to eggs is an advanced technique that I haven’t mastered yet. Sprinkling on some shredded cheese when the eggs are close to being done then putting a lid on it to melt may be the preferred technique but that will require additional research. My mom does have an egg-only frying pan but I don’t have room for that kind of dedication in my kitchen.

SCRAMBLED SCALLION EGGS
Serves 2 

4-5 large eggs
1-teaspoon water
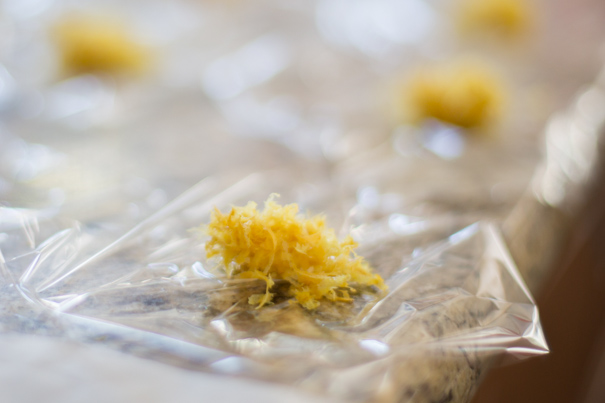
1 scallion, thinly sliced
Safflower oil
Salt and fresh ground black pepper

In a medium bowl, scramble your eggs with a fork until they look uniform in color. Add the water and stir to combine. Stir in the scallion and set aside. 

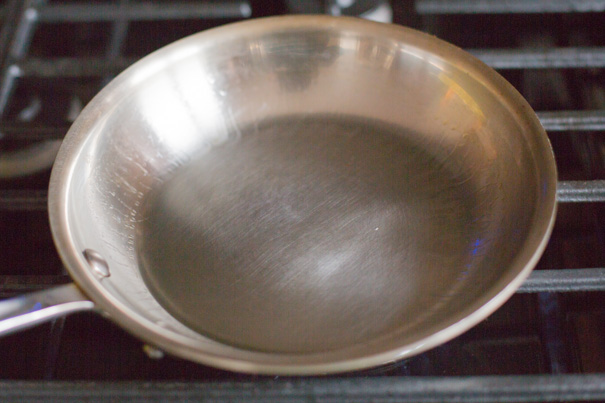
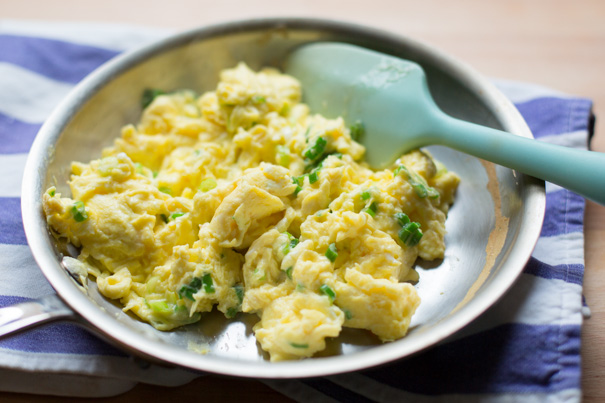
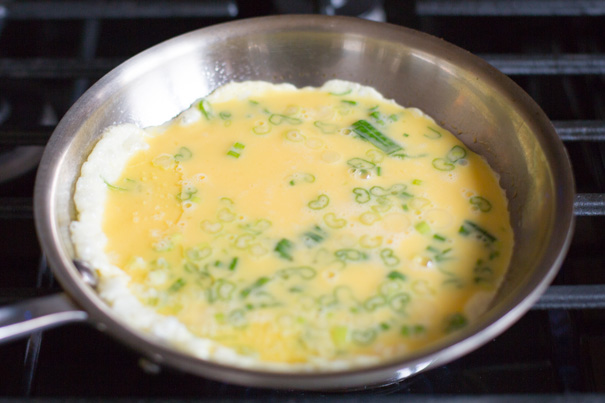
Heat a 7- to 8-inch frying pan over medium-high heat (if your pan isn’t well seasoned, use a non-stick pan). Add a small pour of oil to coat the pan. Be sure to coat the walls too. Heat the oil until it shimmers and the oil starts forming thin ribbons on the walls. Pour the egg mixture in all at once. Using a silicone spatula, start pulling the eggs from the walls to the center of the pan. Continue pulling and occasionally flipping the eggs over. Once they stop looking really wet, your eggs are done. Sprinkle with salt and pepper to taste. Enjoy! 

Tuesday
May072013

Mise en Place for a Lemon Roast Chicken

One of the things that grosses me out when cooking a whole chicken is needing to touch things that remain on the counter or cupboard - spice jars, pepper mills and oil containers - with dirty, poultry hands. To prevent having to wipe/sanitize everything down after I’m done prepping, I mise en place (French for 'put in place') like crazy, thinking through all the things I’ll need for prepping and trussing my chicken.

  1. Olive oil: Wrap the bottle with a paper towel and secure it with a rubber band to keep the bottle clear of wet chicken juice hands
  2. Paper towels: grab a few to dry off and soak up and chicken juices that accumulate on your board
  3. Toothpicks/twine: Pre-cut 18-inches of kitchen twine or have a small number of toothpicks on your cutting board
  4. Herbs: Grab however much you’ll need and give it a good rinse
  5. Salt and pepper: Pre-grind the pepper and dose out the salt onto a small dish. Shake it up to mix
  6. Lemon: Rinsed and cut in half or quarters, ready to be stuffed inside the bird
  7. Bonus round item: One disposable plastic glove. I’ll often just glove my left hand (I’m right-handed) to handle the chicken leaving my right hand clean to sprinkle, stuff and pinch the ingredients

Plopped onto a baking pan, all you have to do is wait for the sucker to come out of the oven. Easy peasy. 

Monday
May062013

Taste of the Eastside

Last week, I helped my friend Jane work the Canelé stand at the Taste of the Eastside event at Barnsdall Art Park (home to the Hollyhock House). There were about 2-1/2 dozen vendors - all coming from the Los Feliz, Atwater Village, Silverlake, Glendale, Echo Park, Highland Park and Eagle Rock neighborhoods.

Jane, my first roommate in New York, is co-owner of Canelé, a farmers’ market-driven and Mediterranean-inspired restaurant. And if I may, it’s THE restaurant that put Atwater Village on the LA restaurant map. We served a farro salad with apples, almonds, spring onions and French feta cheese. Delish! The event was pretty much as she described it: busy. It wasn’t until half an hour before the event was over that I thought it would be safe to leave her for five minutes. Although many of the stands were already sold out and packed up by the time I wandered around, I did get to sample a few things and take some business cards. I'm looking forward to trying some of these restaurants sitting down! 

(Images, from the top! Our table; only a handful of the plates we served; event goers; cauliflower cake from The Park; pea shoot and barley salad from Mohawk Bend; chicken curry tostada from Xoia)

Friday
May032013

Limoncello - Part II

BEFORE:

AFTER:
DING DING DING DING DING! 45-days have passed so that means it’s time to add the simple syrup to the lemon zest/vodka slurry. You can see the vodka has extracted the color from the zest and thus the flavor too. I tasted the mixture after adding the simple syrup and whoa, it’s pretty fiery! Let’s hope it mellows out a bit. We’ll see! I have to wait at least another 45-days to find out. Stay tuned!

Raise a glass and toast the weekend! See you back here on Monday!

Thursday
May022013

Cheese Pencils

You know how sometimes you just want a shaving or two of cheese on a salad but you forgo doing it because then you’d have to lug out the big ol’ brick and the grater? Well here’s a totally hilarious product that I’d buy in a heartbeat if I lived in Germany: the Cheese Shaving Pencil set from The Deli Garage. Just like you’d sharpen a pencil, you sharpen these cheese sticks but instead of throwing away the shavings, that’s the cheese! Brilliantly fun and they come in three different flavors (chile, pesto and truffle) to keep that salad festive.

Thanks for the news bite, Barb!

(Images via Korefe)

Wednesday
May012013

Almond Milk and Kahlua Panna Cotta w/Macerated Blackberries

Since Mr. Mari and I are still trying to lose our Freshmen Ten, dessert is usually a no-no. Perhaps it’s the bartending course I’m taking that’s getting me thinking about different alcohols and their uses but I thought, hmmm… almonds and coffee go together, why not combine the two? The boozy hamster is on its wheel…

Presenting: The almond milk and Kahlua panna cotta with macerated blackberries! Panna cotta’s a fancy way of saying cream-based gelatin (actually in Italian it literally means cooked cream). Cooked jello cream definitely sounds gross, meanwhile panna cotta sounds so fahncy and laborious (which it's not)! You could totally skip the macerated blackberries and just eat the panna cotta but it presents much nicer for photos and company with them. Using almond milk will yield a much lighter than traditional panna cotta and since Mr. Mari and I are lactose intolerant, almond milk is our "dairy" of choice at home. 

I made my recipe in little flexible plastic cups so I didn’t need to grease the insides. If you use anything else, use a little neutral flavored oil on a paper towel to grease the inside.


MACERATED BLACKBERRIES
makes one cup 

1-tablespoon agave nectar
1/8-teaspoon lemon juice
1-cup blackberries, rinsed 

Put agave nectar and lemon juice in a non-reactive bowl. Stir to combine. Add blackberries and toss to coat. Let sit for 30 minutes at room temperature. Smash two blackberries using the back of a fork. Toss again to coat. Set aside.


ALMOND MILK & KAHLUA PANNA COTTA
makes 6 servings, 5 if you want to be piggy
Adapted from David Lebovitz 

2-tablespoons Kahlua
1-teaspoon almond extract
1-tablespoon water
1 packet gelatin
2-cups almond milk
3-tablespoons agave nectar

In a medium-sized bowl, pour in the Kahlua, almond extract and water. Sprinkle the gelatin on top and set aside.

In a small saucepan, heat almond milk and agave syrup. When mixture comes to almost boiling, remove from heat. Let it sit for one minute before pouring on top of the gelatin mixture. Stir to combine and let come to room temperature. Pour into individual cups. Press plastic wrap onto surface and chill in fridge until firm.

To serve, warm each cup in hot water just until it releases. Place plate on top and invert. Spoon a few blackberries and a tablespoon of syrup on top. Enjoy! 

Tuesday
Apr302013

TVP Stuffed Artichokes

It’s full on artichoke season here. Growing up, my mom would use Progresso Italian-flavored breadcrumbs to stuff her artichokes. Since I’m still on my low-carbish kick, I wanted to try substituting the magical TVP (textured vegetable protein) instead. It worked! The two corrections I’ll make for next time is to drizzle some butter on top instead of olive oil and to pulse-grind the TVP in the food processor for a few seconds to get the “crumb” size a little smaller. So yay! Stuffed artichokes can be and will be a part of our spring menu.

Click to read more ...

Monday
Apr292013

Tip: Save Your Lemon Zest! 

Next time you buy a lemon for some lemon juice, don’t throw out half your purchase - save the zest! Before juicing the lemon, Microplane zest the lemon (zesting is easier when it’s whole). When zesting, zest onto a non-reactive surface (wooden cutting board, glass bowl - never metal). Keep your zest-free lemon in the fridge in a zipper bag or container, it'll dry out if you leave it unwrapped. You’ll also notice the lemon is much easier to squeeze for juice once the zest is removed.

Place teaspoon clumps of zest on pieces of plastic wrap, fold them over tightly and freeze them for later. It’ll defrost pretty quickly and makes for a nice zippy ingredient in salad dressings, marinades, and baked goods.

Here’s a quickie: For every two cups of cooked quinoa, add a teaspoon of lemon zest, a generous squirt of lemon juice (or one teaspoon vinegar), a sliced scallion, a generous pinch of salt and fresh ground black pepper. Delish and an easy peasy side dish!