I admit it; some of my ideas fall on the wacky side. I’ll fixate on a concept, get really really excited about it and make it - jumping in with both feet instead of baby stepping it and doing a trial run. Sometimes I’m super happy and proud of the results. Other times, I’m surprised and a little frustrated that it didn’t work.

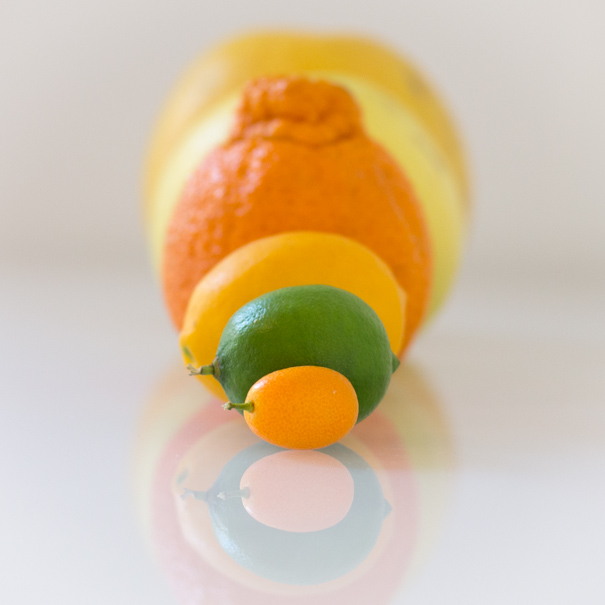
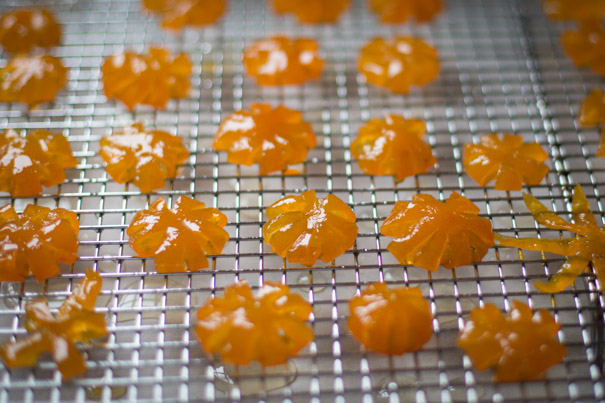
 Being surrounded by fresh citrus, I had this idea of making a candied citrus flower using different sized fruits to create concentric petal rings. Instead of cutting the peel into individual strips, I’d just cut the peel into thin segments, keeping all the strips attached at the base and then shape/dry the candied fruit on inverted bowls. How long could it take? Meh, 3 hours - tops! It didn’t even cross my mind that it wouldn’t work.
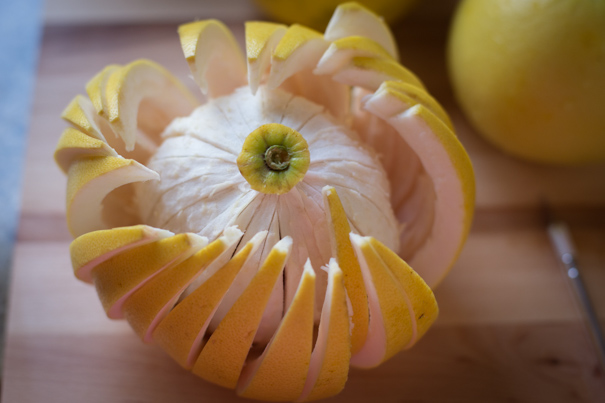
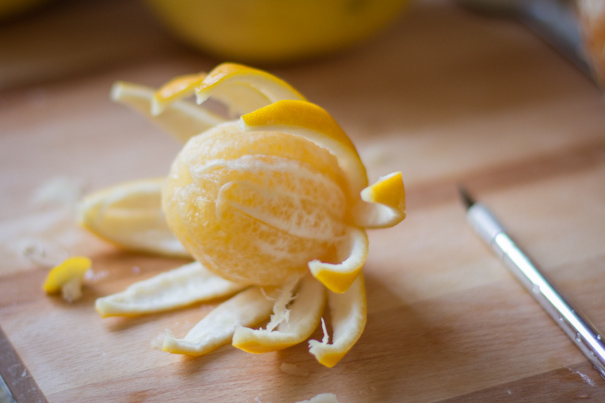
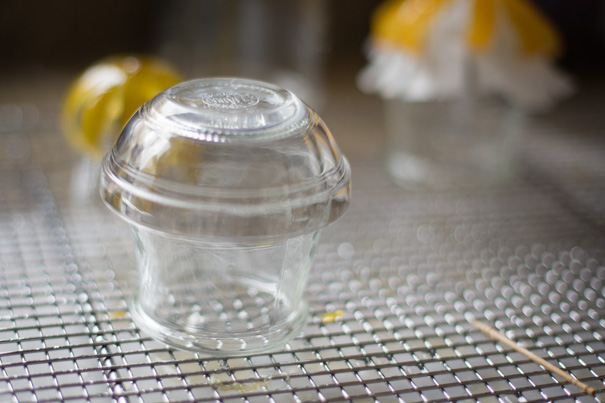
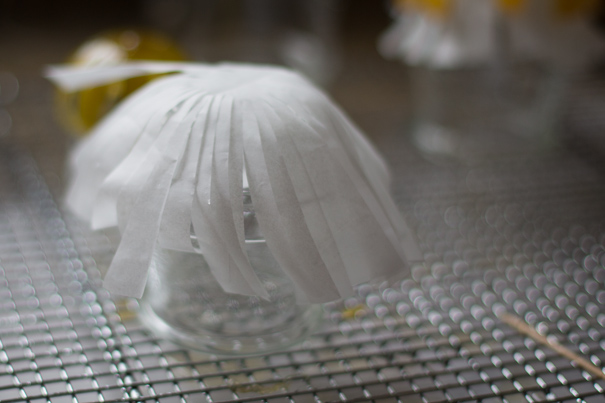
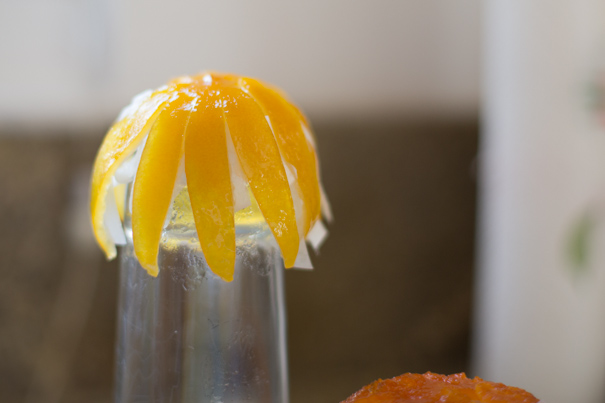 By cutting the petals close to the base, the connection was very narrow. I thought this would net a much more realistic flower. What I didn’t realize was the weight of the simple syrup combined with the fragility of that thin connector would be enough to tear a petal off. Once a petal’s missing, the flower looks broken and wrong. To salvage this project that took not three hours but three days, I just tore all the petals off the lemon, orange, grapefruit, and pomelo flowers and tossed them in sugar. The limes and kumquats remained intact enough to make a mini flower (check back for the follow up to this idea).
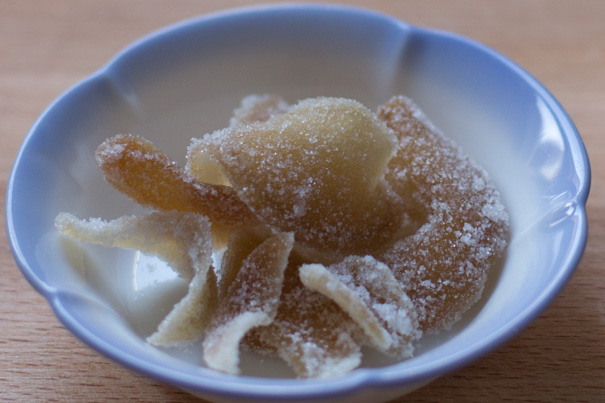
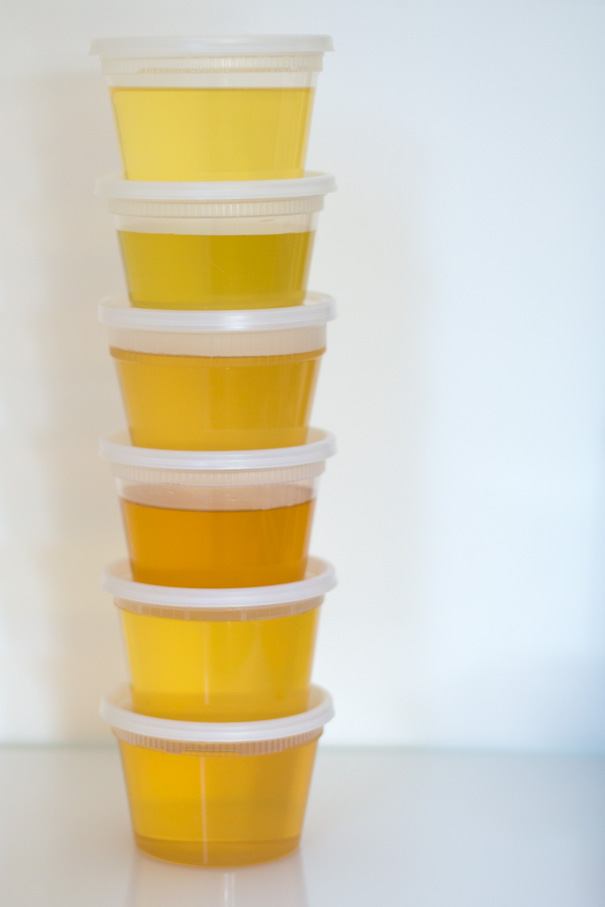 The wacky project may not have turned out exactly how I intended but all the candied peels were still tasty. AND, not only do I have fresh squeezed juice in the freezer but I have lots of delicious simple syrups at the ready to make a lightly flavored homemade soda, to drizzle over some fruit or add into a cocktail. I’d say this project was a roaring success.
If you plan on making more than one fruit flavor, cook them separately to keep the flavors clean. The below recipe is for just one fruit but since it takes a bit of effort, I’d make at least 2 grapefruits, 3 oranges or 4 lemons at a time.
CANDIED CITRUS PEEL
Citrus fruit of your choosing
1-cup sugar plus additional for coating
Cold water
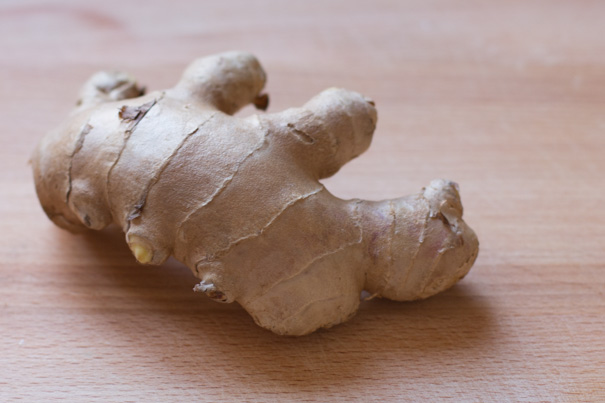
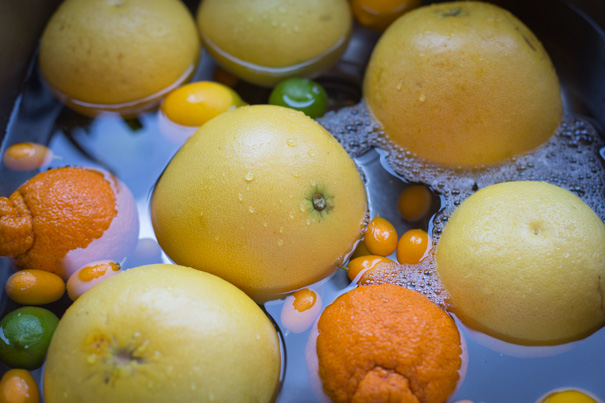
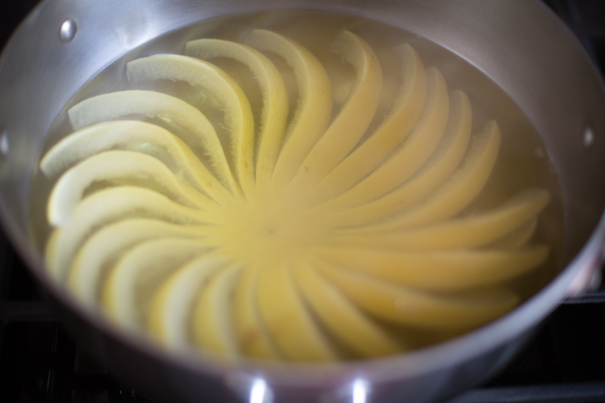
Cut the rind into eight segments, from pole to pole. Carefully peel the rind off. Save the fruit for a different use. Cut the peel segments into thinner pieces, each piece being no more than a quarter-inch wide. Put them in a small pot and cover the pieces in cold water by one inch. Bring the water to a boil, lower the heat to a simmer and cook for ten minutes. Drain the water and repeat this step two more times. Drain well.
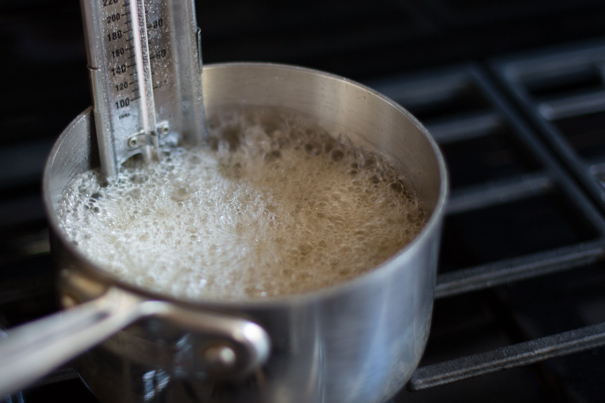
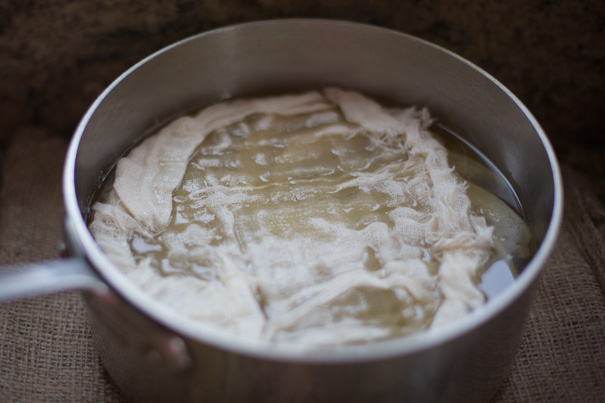
To candy the peel, you’ll need one cup of water per cup of sugar. You’ll want to cover the peel by half an inch so add a cup of cold water at a time until covered. Add the same number of cups of sugar. Bring the mixture to a boil; do not stir but wash down the sides of the pot with a clean brush dipped in water a few times to ensure there are no sugar crystals sticking to the sides. Lower the heat to medium low and cook for 45 minutes. Remove from heat and let it sit for 8-12 hours or overnight, covered with a cloth. Bring the mixture to a boil, lower the heat to medium low and cook for an additional 45 minutes.
Meanwhile, place a wire rack on the counter with enough waxed paper beneath it to catch any potential drips. Carefully strain a few pieces at a time; place on wire rack, pith side down, keeping them spaced apart. Let dry for 8 hours.
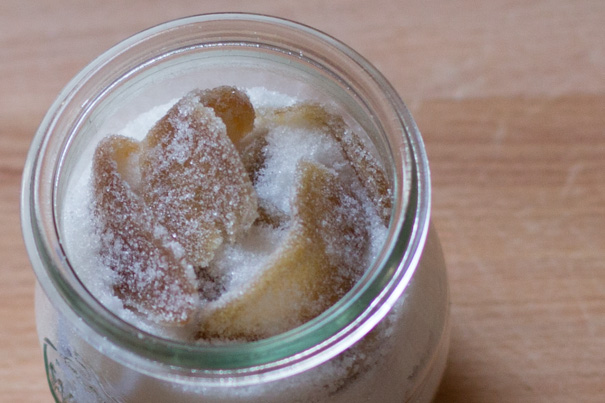
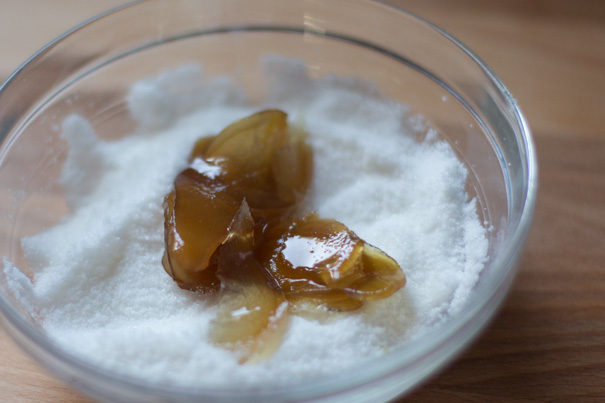
Pour some sugar to a small bowl. Add a few pieces of candied peel at a time to the bowl and toss to coat. Tamp the excess sugar off. Store the candied peel in an airtight container. Enjoy!
Strain the sugar syrup to remove any stray bits of peel. Store in the fridge. It should be used within one month. Enjoy #2!
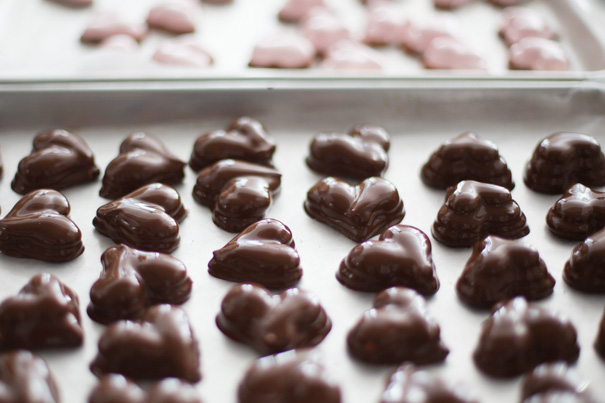
Gilding the lily: Dip one end of the candied peel in melted dark chocolate and place in fridge for 10-15 minutes to firm up.
Really gilding the lily: Finely chop some pistachio nuts. After dipping the peel in chocolate, dip it in the chopped pistachios. Chill in fridge for 10-15 minutes or for as long as you can wait.

 As a kid, there were commercials on TV advertising Chia Pets. “Ch-ch-ch-chia!” I never gave much thought to what was actually growing on those ceramic figurines, they just magically sprouted hair and fur! It wasn’t until a couple years ago when I started hearing about chia seeds and their health benefits that the light bulb went off - Ohhhh! Chia Pets were covered in… chia seeds! Doh!
 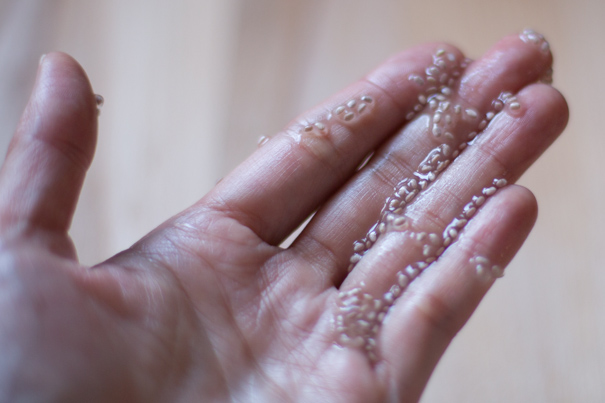 Chia seeds are, I will admit, a little weird in texture. Once expanded, they look and feel a bit like tomato seeds but you'll probably never manhandle chia seeds post expansion. They’re a little slimy (like tapioca) and pop-crunch in your mouth. They aren’t quite as firm a pop as poppy seeds but you kinda see where I’m heading, right? I haven't done a really good job at selling chia seeds but you should try them because they’re really good for you (lots of Omega-3), a super easy way of getting some fiber in your diet and are pretty carb friendly. Did that work?
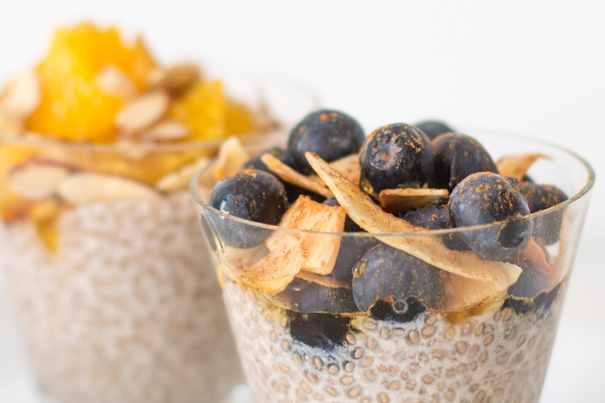
 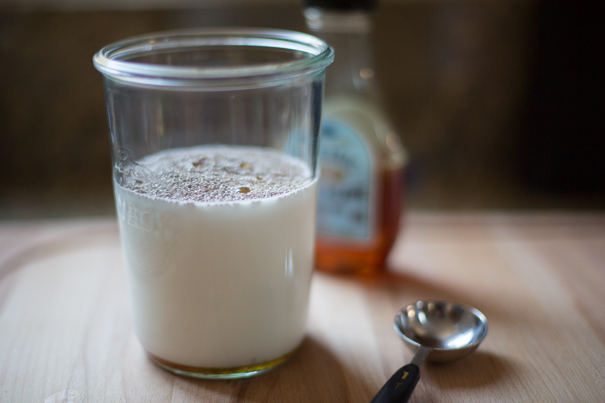 My friend shared this chia seed pudding recipe with me. Really simple, she said. And oh, yes it is. She eats her coconut milk version without any sweetener but I like it with just a skosh more sweetness. Feel free to doctor it as you like since it’s like eating tapioca pudding - the possibilities are endless!
 Permalink